FPGA Programming
Guide to programming FPGA boards with compiled bitstreams in SCI-Compiler. Learn about supported programming cables for Xilinx and Intel devices, understand the programming process, configure hardware connections, and troubleshoot common programming issues.
Introduction
After successful firmware compilation, the next step is programming the FPGA - downloading the bitstream file to the board’s FPGA to configure its logic.
Prerequisites
Before programming:
- Successful compilation - Bitstream file generated
- Board powered on - Connected to power supply
- Programming cable connected - JTAG cable to PC
- Drivers installed - Cable drivers for Vivado/Quartus
- Correct project open - SCI-Compiler uses currently open project
Supported Programming Cables
Different boards require different programming cables.
Xilinx Boards (DT5550, DT1260, DT5550W)
Supported JTAG cables (from Xilinx UG908):
Xilinx Official Cables:
- SmartLynq Data Cable (HW-SMARTLYNQ-G)
- Platform Cable USB II (DLC10) - Most common
- Platform Cable USB (DLC9G, DLC9LP, DLC9)
Digilent Compatible Cables:
- JTAG-HS1 - High-speed JTAG
- JTAG-HS2 - Improved version
- JTAG-HS3 - Latest high-speed
- JTAG-SMT1 - Surface-mount module
- JTAG-SMT2 - Updated SMT version
Recommended: Platform Cable USB II or Digilent JTAG-HS2 for best performance.
Intel/Altera Boards (V2495, V2495X)
Supported cable:
- USB-Blaster (Intel FPGA Download Cable)
- Described in Intel document UG-USB81204
Versions:
- USB-Blaster (original)
- USB-Blaster II (faster, supports more features)
Cable Connection
Physical connection:
- Locate JTAG connector on board (usually 2x7 or 2x5 pin header)
- Connect programming cable
- Plug USB cable into PC
- Wait for drivers to recognize cable
- Verify in Device Manager (Windows) or lsusb (Linux)
Programming Process - Xilinx Boards
Programming DT5550, DT1260, or DT5550W boards.
Hardware Setup
- Power on the board
- Connect JTAG cable to board’s JTAG port
- Connect USB from JTAG cable to PC
- Verify cable recognized by system
Start Programming
- Ensure correct project is open in SCI-Compiler
- Click Program FPGA button (Home toolbar, Compiler group)
- Programming process begins automatically
Programming Steps
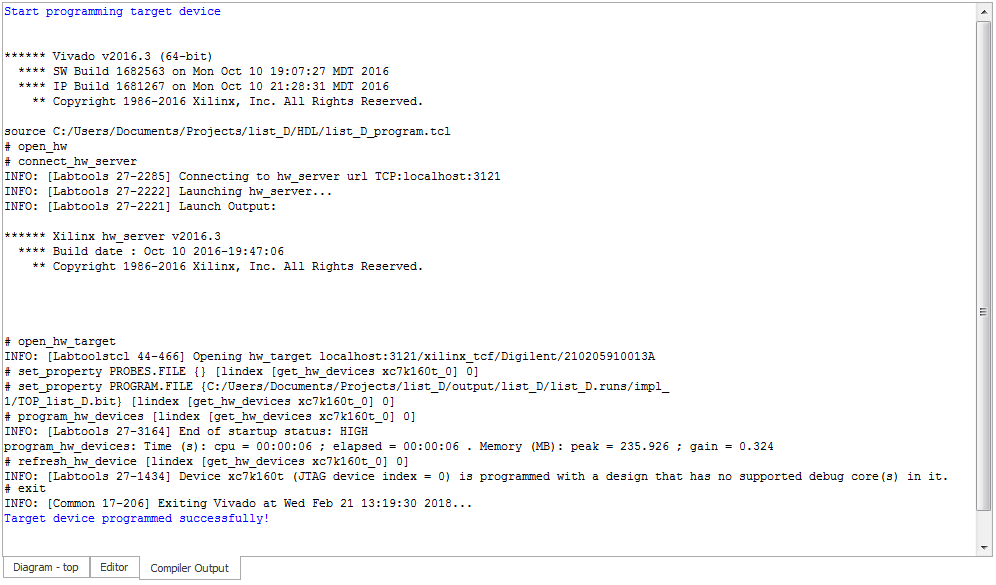
Figure 1: Vivado FPGA programming output
Automatic sequence:
- Compiler Output displayed - Shows progress messages
- Status bar updates - “IDLE” → “PROGRAMMING”
- Progress bar animates - Indicates completion percentage
- TCL script generated - In
HDL/folder - Vivado launched - From shell/command line
- Cable detection - Lists available JTAG cables
- Cable connection - Connects to detected cable
- FPGA detection - Opens target FPGA device
- Bitstream download - Programs FPGA with
.bitfile - Verification - Confirms programming success
Output Messages
Typical Vivado output:
Connecting to hw_server...
INFO: Found cable: Digilent JTAG-HS2 210249A12345
Connecting to target...
INFO: Device detected: xc7a100t
Programming FPGA...
INFO: Downloading bitstream to device
Programming successful
Target device programmed successfully!
Success indicator:
Target device programmed successfully!
After Programming
- Status bar returns to “IDLE”
- Progress bar resets
- FPGA is configured with your design
- Ready to test with Resource Explorer or SDK
Programming Process - Intel Boards
Programming V2495 or V2495X boards.
Hardware Setup
- Power on the board
- Connect USB-Blaster to board’s JTAG port
- Connect USB from USB-Blaster to PC
- Verify cable in Quartus Programmer (if needed)
Start Programming
- Ensure correct project is open in SCI-Compiler
- Click Program FPGA button
- Programming process begins
Programming Steps
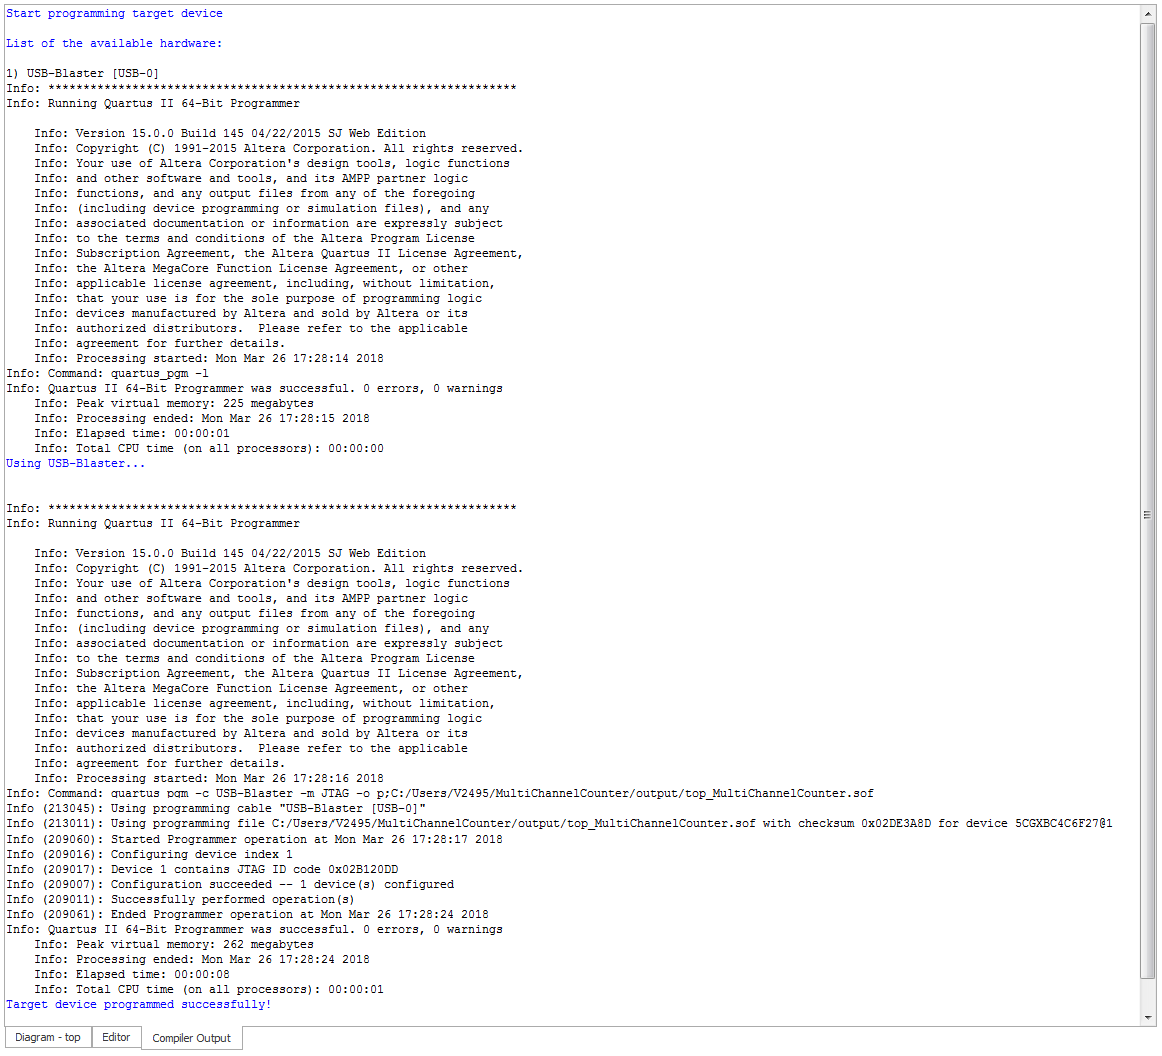
Figure 2: Quartus FPGA programming output
Automatic sequence:
- Compiler Output displayed
- Status bar: “IDLE” → “PROGRAMMING”
- Progress bar indicates completion
- Quartus launched from command line
- Cable enumeration - Lists USB-Blaster cables
- Cable selection - Automatically selects USB-Blaster
- Device detection - Identifies target FPGA
- Programming - Downloads
.soffile - Verification - Confirms success
Output Messages
Typical Quartus output:
Info: *******************************************************************
Info: Running Quartus Prime Programmer
Info: Command: quartus_pgm -c USB-Blaster firmware.cdf
Info:
Info: 1) USB-Blaster [USB-0]
Info: Using programming cable "USB-Blaster [USB-0]"
Info: Initializing...
Info: Detected JTAG chain: EP4CE115
Info: Programming device...
Info: Successful program operation
Target device programmed successfully!
Success indicator:
Target device programmed successfully!
Bitstream File Location
SCI-Compiler automatically uses the bitstream from the currently open project.
File Paths
Xilinx boards (.bit file):
ProjectFolder/output/design_1.bit
Intel boards (.sof file):
ProjectFolder/output/design_1.sof
Important Note
The correct project must be open for programming to work correctly!
If you want to program FPGA with a specific bitstream:
- Open the corresponding project in SCI-Compiler
- Then click Program FPGA
Do NOT:
- Open Project A
- Try to program with bitstream from Project B
- It won’t work - wrong bitstream will be used
Programming Modes
Volatile Programming (Default)
What it does:
- Programs FPGA SRAM configuration
- Active immediately after programming
- Lost on power cycle - Not persistent
Use cases:
- Development and testing
- Frequent firmware updates
- Debugging designs
Advantage: Fast, no flash wear
Disadvantage: Must reprogram after power off
Non-Volatile Programming
What it does:
- Programs on-board Flash memory
- Automatically loads on power-up
- Persistent through power cycles
How to enable:
- Not directly supported in SCI-Compiler
- Use Vivado/Quartus standalone tools
- Flash programming tools specific to board
When needed:
- Production deployment
- Field installations
- Boards without PC connection
Boards with Flash:
- DT5550 - Yes (flash programming via Vivado)
- V2495 - Yes (flash programming via Quartus)
- DT1260 - Check board documentation
Progress Indicators
Status Bar
Left corner - Status label:
- IDLE - No process running (before/after)
- PROGRAMMING - FPGA programming in progress
Right corner - Progress bar:
- Shows completion percentage
- Animated during programming
- Resets when complete
Compiler Output Tab
Automatically displayed when programming starts
Message types:
- Blue - SCI-Compiler operations
- Black - Vivado/Quartus output
- Orange - Warnings
- Red - Errors
Troubleshooting
No Programming Cable Detected
Problem: “No cable found” or “Cable not detected”
Solutions:
- Verify cable connected to board JTAG port
- Check USB connection to PC
- Install/update cable drivers
- Test cable in Vivado/Quartus standalone
- Try different USB port
- Power cycle board and PC
Xilinx cables:
- Install Vivado drivers (hw_server)
- Check Windows Device Manager for “Xilinx USB Cable”
Intel cables:
- Install Quartus drivers
- Check Device Manager for “USB-Blaster”
FPGA Not Detected
Problem: Cable found but FPGA not detected
Solutions:
- Verify board is powered on
- Check JTAG chain connections
- Inspect JTAG cable for damage
- Try programming in Vivado/Quartus GUI to diagnose
- Check for board hardware issues
Programming Fails
Problem: “Programming failed” or error messages
Solutions:
- Verify correct bitstream (.bit/.sof exists)
- Check bitstream matches board type
- Ensure sufficient board power supply
- Try reprogramming
- Check for FPGA damage (rare)
Wrong Bitstream Programmed
Problem: Board doesn’t behave as expected
Solutions:
- Verify correct project is open in SCI-Compiler
- Check bitstream file timestamp (recently compiled?)
- Recompile if needed
- Program again with correct project open
Permission Errors (Linux)
Problem: “Permission denied” accessing cable
Solutions:
- Add user to dialout/plugdev group
- Configure udev rules for cable
- Run with sudo (not recommended for production)
# Add user to groups
sudo usermod -a -G dialout $USER
sudo usermod -a -G plugdev $USER
# Create udev rule (example for Digilent)
echo 'SUBSYSTEM=="usb", ATTRS{idVendor}=="1443", MODE="0666"' | \
sudo tee /etc/udev/rules.d/52-digilent.rules
sudo udevadm control --reload-rules
Cable Conflicts
Problem: Multiple tools accessing cable
Solutions:
- Close Vivado/Quartus GUI if open
- Close other programming tools
- Kill hw_server processes (Xilinx)
- Disconnect and reconnect cable
Slow Programming
Problem: Programming takes too long
Solutions:
- Check USB cable quality (use short, good quality)
- Try different USB port (avoid hubs)
- Update cable firmware
- Check for USB 2.0 vs 3.0 compatibility
Manual Programming Alternative
If SCI-Compiler programming doesn’t work, use standalone tools:
Vivado Programming (Xilinx)
- Open Vivado
- Open Hardware Manager
- Open Target → Auto Connect
- Right-click device → Program Device
- Select
.bitfile fromoutput/folder - Click Program
Quartus Programming (Intel)
- Open Quartus Prime Programmer
- Click Hardware Setup
- Select USB-Blaster
- Add File → Select
.soffromoutput/folder - Check Program/Configure
- Click Start
Best Practices
Before Programming
- Save project - Ctrl+S
- Verify compilation success - Check for bitstream
- Close other tools - Avoid cable conflicts
- Check board power - Stable power supply
During Programming
- Don’t interrupt - Let process complete
- Monitor output - Watch for errors
- Wait for success message - Don’t assume completion
After Programming
- Verify LED indicators - Board-specific LEDs
- Test with Resource Explorer - Before custom software
- Check basic functionality - Registers accessible?
- Document version - Note bitstream date/version
Flash Programming for Production
When deploying to field:
- Test thoroughly with volatile programming
- Program to flash using board-specific method
- Power cycle to verify auto-load
- Document flash programming procedure
- Keep backup of working bitstream
Programming Cable Comparison
Xilinx Cables
| Cable | Speed | Cost | Availability | Recommended |
|---|---|---|---|---|
| Platform Cable USB II | Medium | Medium | Good | ✓ Yes |
| SmartLynq | Very Fast | High | Limited | Production |
| JTAG-HS2 (Digilent) | Fast | Medium-Low | Excellent | ✓ Yes |
| JTAG-HS3 (Digilent) | Very Fast | Medium | Good | ✓ Yes |
| Platform Cable USB | Slow | Low | Fair | Legacy only |
Intel Cables
| Cable | Speed | Cost | Availability | Recommended |
|---|---|---|---|---|
| USB-Blaster II | Fast | Medium | Good | ✓ Yes |
| USB-Blaster | Medium | Low | Excellent | ✓ Budget option |
Summary
FPGA programming is the final step to deploy your firmware:
| Board Type | Cable | File Format | Tool |
|---|---|---|---|
| DT5550 | Platform Cable USB II / JTAG-HS2 | .bit |
Vivado |
| DT1260 | Platform Cable USB II / JTAG-HS2 | .bit |
Vivado |
| DT5550W | Platform Cable USB II / JTAG-HS2 | .bit |
Vivado |
| V2495 | USB-Blaster | .sof |
Quartus |
| V2495X | USB-Blaster | .sof |
Quartus |
Programming process:
- Open correct project in SCI-Compiler
- Connect and power board
- Connect JTAG cable
- Click Program FPGA
- Wait for “Target device programmed successfully!”
- Test with Resource Explorer
Common issues:
- Cable not detected → Check drivers, connections
- FPGA not detected → Check power, JTAG chain
- Programming fails → Verify bitstream, board health
- Wrong behavior → Ensure correct project open
Next step: Test your firmware with Resource Explorer or custom SDK application!