Contextual Menu
Guide to the SCI-Compiler contextual (right-click) menu system. Learn to insert blocks in-place, edit block properties, create automatic fan-out connections, duplicate blocks with auto-increment, and access quick actions directly from the diagram editor.
Introduction
The Contextual Menu is a powerful feature in SCI-Compiler that provides quick access to commands and block insertion directly from the diagram canvas.
Accessing the Contextual Menu
Right-click on:
- White space (empty diagram area) - General commands and block insertion
- Blocks - Block-specific operations and properties
The menu content changes based on what you click on, providing context-sensitive options.
Contextual Menu on White Space
Right-clicking on empty diagram area displays the full contextual menu.
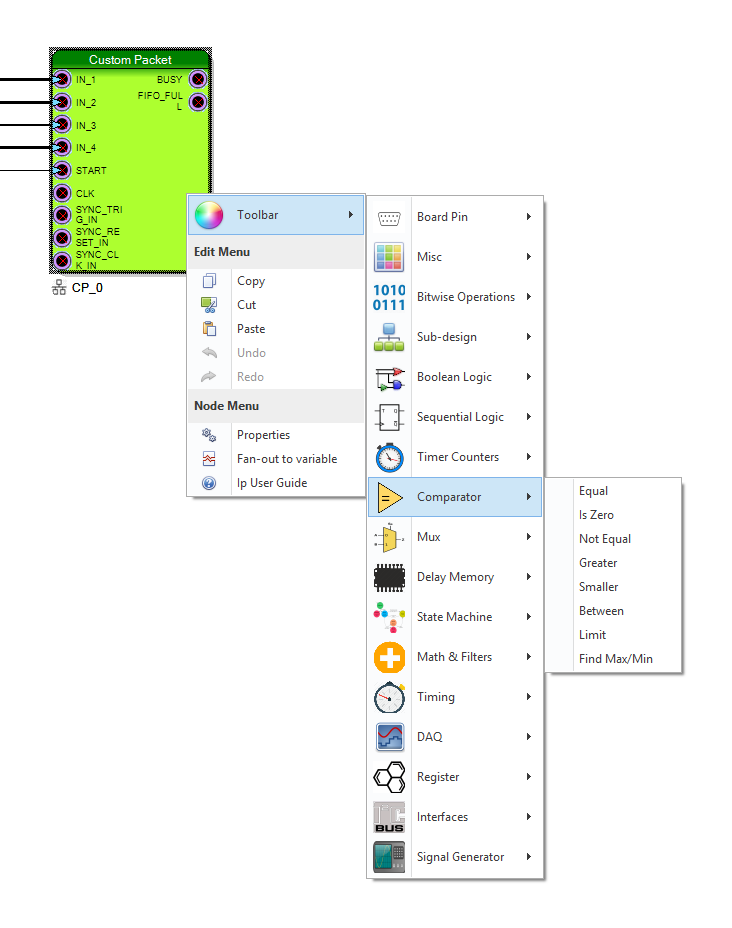
Figure 1: Full contextual menu with all available blocks
Menu Contents
The contextual menu contains:
- Toolbar commands - Copy of common toolbar functions
- Block library - All virtual blocks organized by category
- Quick actions - Paste, undo, redo, etc.
Toolbar Commands Section
Quick access to editing tools:
| Command | Shortcut | Function |
|---|---|---|
| Cut | Ctrl+X | Cut selected blocks/wires |
| Copy | Ctrl+C | Copy selected blocks/wires |
| Paste | Ctrl+V | Paste from clipboard |
| Delete | Del | Delete selected items |
| Undo | Ctrl+Z | Undo last action |
| Redo | Ctrl+Y | Redo undone action |
Block Categories
All available blocks organized hierarchically:
Wire
- Board Pin (Analog In, Digital I/O)
- Misc (Constants, Clocks, Converters)
- Binary Operations (Join, Split, Select)
- Sub-design
Logic
- Boolean Logic (AND, OR, XOR, NOT, etc.)
- Sequential Logic (Flip-flops, Latches, Edge Detectors)
- Timer Counters (Counters, Timers, Chronometers)
- Comparator
- Mux/Demux
- Delay Memory (Delays, RAM, ROM, FIFO)
Signal Processing
- State Machine
- ALU (Add, Subtract, Multiply, etc.)
- Timing (TDC, ToT, SCA)
- DAQ (Oscilloscope, Spectrum, QDC, etc.)
Communication
- Register (Read/Write)
- Serial Bus (I2C, SPI, UART)
Board-Specific
- Board-dependent blocks (varies by platform)
In-Place Block Insertion
Blocks are inserted “in-place” - near the cursor position where you right-clicked.
How It Works
- Right-click at desired location in diagram
- Navigate menu hierarchy to find block
- Click block name
- Block appears at cursor position
Advantages
- Faster than toolbar → click → drag workflow
- Precise placement - block appears exactly where needed
- Less mouse movement - more efficient design
- Context stays local - no need to look away to toolbar
Example Workflow
Adding a counter near existing trigger logic:
- Right-click next to trigger block
- Navigate: Logic → Timer Counters → Rising Edge Counter
- Block appears in-place
- Immediately connect to trigger output
Contextual Menu on Selected Block
Right-clicking on a selected block shows block-specific commands.
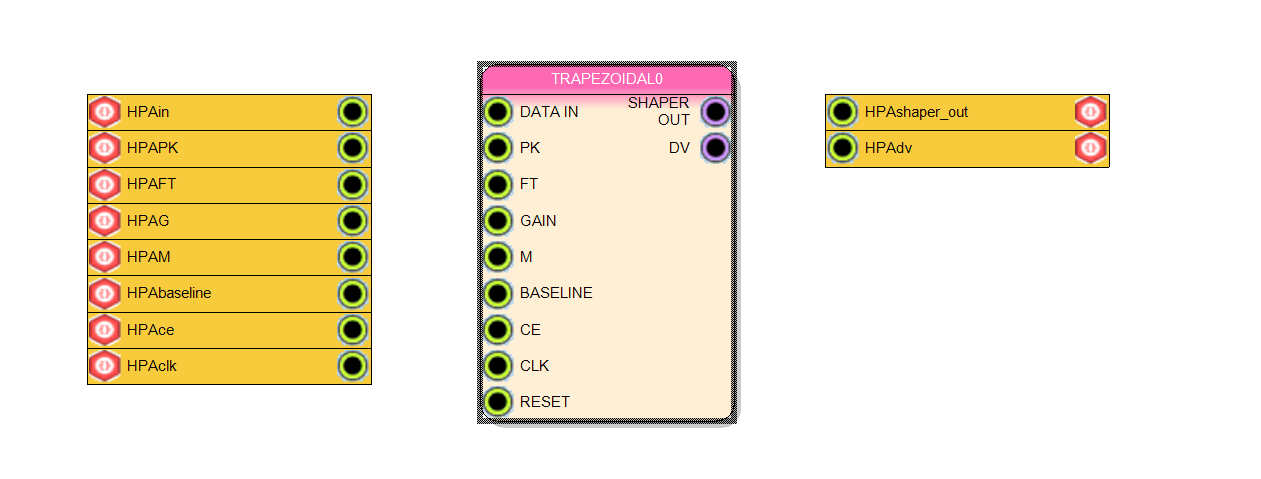
Figure 2: Contextual menu for selected block
Additional Commands
When a block is selected, extra menu items appear:
| Command | Function |
|---|---|
| Properties | Edit block configuration (size, parameters, etc.) |
| Fan-out to Variables | Create automatic connections with variable blocks |
| Help | Open block documentation |
| Duplicate | Copy block (some blocks have special duplication) |
| Delete | Remove block from diagram |
Editing Block Properties
Access block configuration directly from contextual menu.
Properties Command
Function: Opens the same configuration dialog as double-clicking the block.
Use cases:
- Change memory size (RAM, ROM, FIFO)
- Modify number of inputs (multiplexer, logic gates)
- Adjust parameter values (threshold, delay, width)
- Configure block-specific settings
Example - Changing multiplexer inputs:
- Right-click multiplexer block
- Select Properties
- Change “Number of inputs” from 2 to 4
- Click OK
- Block updates with 4 input pins
Automatic Fan-out to Variables
The Fan-out to Variables command creates variable blocks automatically for each output pin.
What Is Fan-out to Variables?
Creates a Variable block for each output pin of the selected block, with variable names matching the pin names.
How It Works
- Right-click on a block with multiple outputs
- Select Fan-out to Variables
- SCI-Compiler creates:
- One variable block per output pin
- Variable name = output pin name
- Automatic connection from pin to variable
Example
Block with outputs named:
trigger_outenergy_valuetimestamp
After fan-out:
- Variable block “trigger_out” connected to trigger_out pin
- Variable block “energy_value” connected to energy_value pin
- Variable block “timestamp” connected to timestamp pin
Benefits
- Fast signal routing - No manual variable creation
- Consistent naming - Variables match pin names
- Clean diagrams - Named connection points
- Easy debugging - Clear signal labels
When to Use
- Signal branching - One output to multiple destinations
- Long-distance connections - Avoid wire clutter
- Documentation - Label important signals
- Debugging - Track specific nets
Duplicate with Auto-Increment
Some blocks support special duplication with automatic name incrementing.
Supported Blocks
Blocks that support auto-increment duplication:
- Registers (Read and Write)
- Board I/O pins
- Variables
- Other named components
How It Works
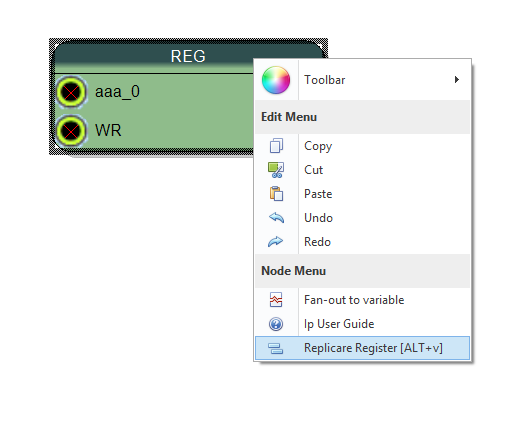
Figure 3: Duplicate with auto-increment dialog
- Right-click on a register block (e.g., “counter_0”)
- Select Duplicate
- Dialog appears: “How many copies?”
- Enter number (e.g., 15)
- Click OK
Result
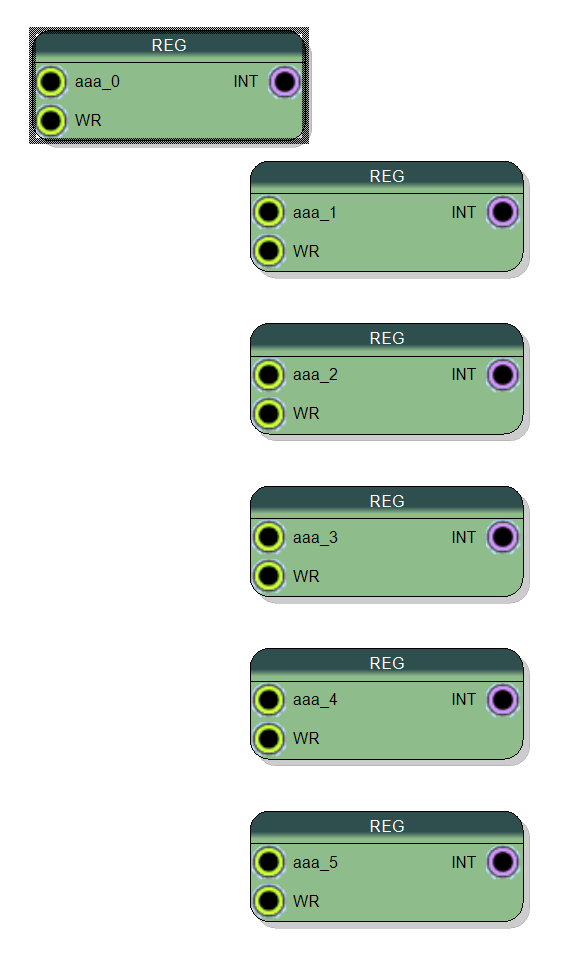
Figure 4: Auto-incremented register blocks
SCI-Compiler creates multiple blocks with auto-incremented names:
- counter_0 (original)
- counter_1
- counter_2
- counter_3
- …
- counter_15
Auto-Increment Rules
Numeric suffix:
- “register_0” → “register_1”, “register_2”, …
- “channel_5” → “channel_6”, “channel_7”, …
No suffix:
- “threshold” → “threshold_1”, “threshold_2”, …
Alphabetic suffix:
- Not auto-incremented (manual naming required)
Layout
Blocks are placed:
- Vertically stacked below original
- Evenly spaced for clarity
- Aligned for neat appearance
Use Cases
Multi-channel systems:
- 16 channel counters for multi-detector array
- 32 threshold registers for each ADC channel
- 64 I/O pins for large connector banks
Array processing:
- Identical processing blocks per channel
- Uniform configuration registers
- Parallel signal paths
Rapid prototyping:
- Quickly expand design from 1 to N channels
- Test scalability
- Duplicate proven sub-circuits
Contextual Menu vs. Toolbar
Comparison of the two access methods:
Contextual Menu Advantages
✓ Faster access - Right-click at target location ✓ In-place insertion - Block appears where needed ✓ Less mouse movement - More ergonomic ✓ Context-sensitive - Different options per selection ✓ Block-specific actions - Fan-out, properties, help
Toolbar Advantages
✓ Always visible - Don’t need to remember categories ✓ Visual organization - Icons and groups ✓ Persistent reference - Can browse without committing ✓ Better for learning - Explore available blocks
Recommendation
- Beginners: Start with toolbar to learn block categories
- Experienced users: Use contextual menu for speed
- Both: Combine based on task and preference
Best Practices
Efficient Block Placement
- Plan ahead - Right-click where block will go
- Use contextual menu - Faster than toolbar
- Connect immediately - Block is already positioned
- Repeat - Build design incrementally
Organizing Large Designs
- Use fan-out to variables - Label important signals
- Duplicate blocks - Multi-channel consistency
- Properties access - Quick parameter tweaks
- Help reference - Verify block behavior
Keyboard + Mouse Combo
Efficient workflow combining both:
- Right-click to insert block
- Alt+F to fan-out connection
- Right-click to insert next block
- Ctrl+D to duplicate
- Right-click → Properties to configure
- Ctrl+S to save
Common Workflows
Creating Multi-Channel Counter System
Goal: 16 rising edge counters with corresponding registers
- Add first counter from contextual menu
- Right-click counter → Duplicate → Enter 15
- Add first register block
- Configure register name “count_0”
- Right-click register → Duplicate → Enter 15
- Connect counter_0 → register_0
- Select connection wire
- Alt+R → Enter 15 → Auto-replicate connections
Result: 16 counters with 16 registers, all connected, in 30 seconds!
Routing Complex Signal Path
Goal: Output from one block to multiple destinations
- Right-click on source block
- Select Fan-out to Variables
- Variable blocks created at outputs
- Right-click on each variable
- Create connections to destination blocks
- Variables act as labeled junction points
Result: Clean diagram with named routing points instead of tangled wires.
Modifying Existing Block
Goal: Change multiplexer from 2 to 8 inputs
- Right-click multiplexer
- Select Properties
- Change “Number of inputs” to 8
- Click OK
- Block updates with 8 input pins
- Connect additional input sources
Result: Block reconfigured without deletion and recreation.
Quick Documentation Lookup
Goal: Verify TDC block functionality
- Right-click TDC block
- Select Help
- Help panel displays TDC documentation
- Review input/output descriptions
- Verify parameter meanings
Result: Instant reference without leaving diagram.
Advanced Techniques
Rapid Prototyping Workflow
Build complete processing chain quickly:
1. Right-click → Add Analog Input
2. Right-click → Add Baseline Restorer
3. Right-click → Add Leading Edge Trigger
4. Right-click → Add QDC
5. Right-click → Add Spectrum
6. Connect with Alt+F fan-out
7. Right-click each → Properties → Configure
Time: ~2 minutes for complete signal chain!
Template Replication
Create processing template and replicate:
- Design single channel processing
- Select all blocks (Ctrl+A or drag-select)
- Right-click → Copy
- Right-click → Paste (repeat N times)
- Adjust register names for each channel
Smart Variable Naming
Use fan-out for consistent naming:
- Design block outputs with descriptive names
- Right-click → Fan-out to Variables
- Variables inherit meaningful names
- Use variables as connection points
- Diagram becomes self-documenting
Contextual Menu Shortcuts
Some operations accessible via contextual menu have keyboard shortcuts:
| Operation | Contextual Menu | Keyboard Shortcut |
|---|---|---|
| Cut | Right-click → Cut | Ctrl+X |
| Copy | Right-click → Copy | Ctrl+C |
| Paste | Right-click → Paste | Ctrl+V |
| Delete | Right-click → Delete | Del |
| Undo | Right-click → Undo | Ctrl+Z |
| Properties | Right-click → Properties | Double-click block |
| Help | Right-click → Help | Click block + view Help panel |
| Duplicate | Right-click → Duplicate | Ctrl+D |
Tip: Learn shortcuts for frequent operations, use contextual menu for less common ones.
Troubleshooting
Contextual Menu Doesn’t Appear
Problem: Right-click does nothing or shows wrong menu
Solutions:
- Ensure you’re clicking in Diagram tab (not Editor or Compiler Output)
- Click on white space or block (not wire)
- Check if another modal dialog is open
- Restart SCI-Compiler if menu system is stuck
Block Not Available in Menu
Problem: Expected block missing from contextual menu
Solutions:
- Verify block is supported for your board type
- Check you’re in correct category (Logic vs. Signal Processing)
- Update SCI-Compiler to latest version
- Consult block compatibility documentation
Fan-out Creates Wrong Variable Names
Problem: Variable names don’t match expectations
Solutions:
- Check block output pin names (used as variable names)
- Rename variables manually after creation
- Modify block pin names in VHDL wrapper (advanced)
Duplicate Doesn’t Auto-Increment
Problem: Duplicated blocks have same name
Solutions:
- Check block type supports auto-increment (registers, I/O)
- Manually rename first block with “_0” suffix
- Use “Add Multi” from toolbar for registers instead
Properties Dialog Validation Fails
Problem: Can’t save changes in Properties dialog
Solutions:
- Check all required fields are filled
- Verify numeric values are in valid range
- Ensure no duplicate names
- Read error message for specific issue
Summary
The Contextual Menu is a powerful productivity tool in SCI-Compiler:
| Feature | Benefit |
|---|---|
| Right-click access | Quick, context-sensitive commands |
| In-place insertion | Faster block placement |
| Block properties | Edit configuration without toolbar |
| Fan-out to variables | Automatic labeled connection points |
| Auto-increment duplication | Rapid multi-channel design |
| Integrated help | Instant documentation lookup |
| Complete block library | All blocks in one menu |
Master the contextual menu to dramatically speed up your firmware design workflow!
Key takeaways:
- Right-click on white space for block insertion
- Right-click on blocks for properties and special actions
- Use fan-out for clean signal routing
- Duplicate with auto-increment for multi-channel systems
- Combine with keyboard shortcuts for maximum efficiency